mountains project
Building processFor this project we got into partnerships to create a mountain landscape out of wood. It was a long process.
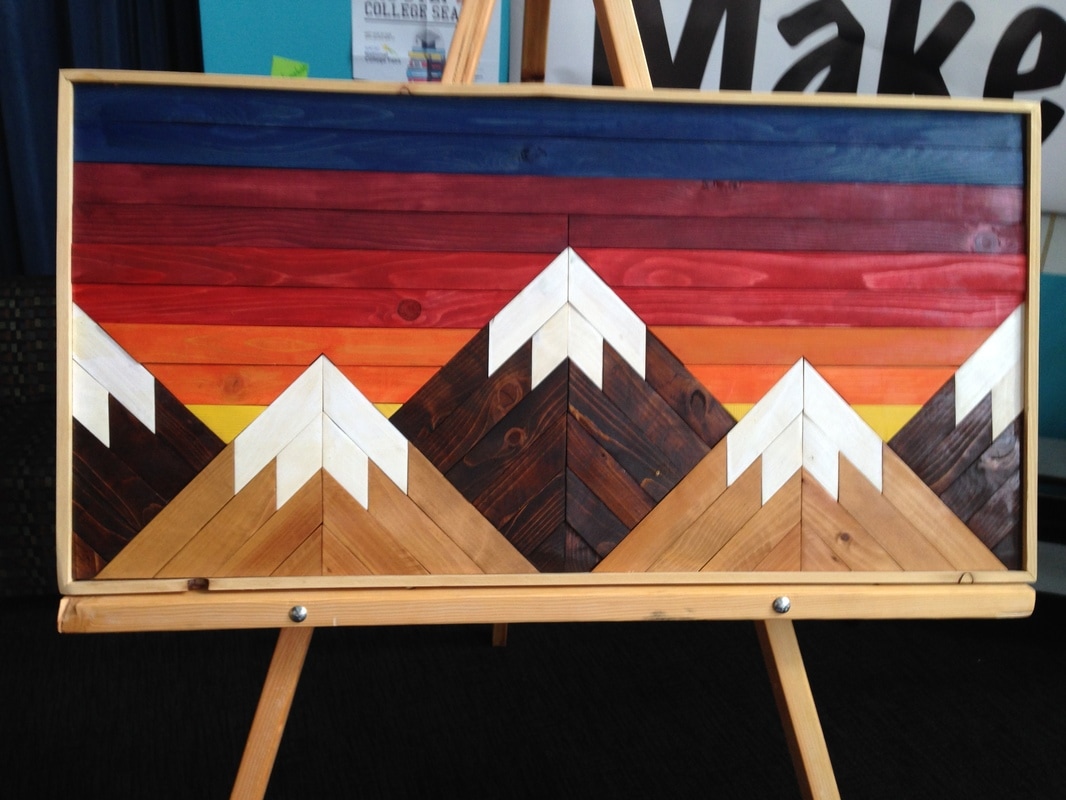
1.) We designed our piece on a piece of graph paper. We had to find exact measurements and figure out what colors we would use. 2.) We cut our board to size. 3.) We made outlines on our board to determine where our pieces would go. 4.) We planed, cut, and sanded our pieces to size and set them onto the board, not yet gluing them. We first started with our mountain pieces, then we did our sky pieces. 5.) We then stained our pieces with wood stain. 6.) We glued our pieces onto our board. 7.) We glued our frame onto the edges of the board. 8.) We sanded our edges, and signed our board. |
ReflectionsThe hardest part of this project for me was getting the sizes of the pieces exact. It was hard to determine how long each piece was because the miter saw would take a bit of length off and using the outlines were tricky.
I am really satisfied with out final product. I think it came out very beautiful and I was pleased when we received multiple bids for it. Our board sold for $80.00 and was listed as Tier 1 (Top tier) on our company's website. I learned how to use basic power tools, and how to delegate tasks more efficiently between two people. |
